Menu

The Gypsy Homestead

~All Good Things Are Wild And Free~

Blog posts March 2021

Dollar Tree Wooden Crate Crafts!!!!

Dollar Tree Wooden Crate Crafts!!!! 

We all love the "Dollar Tree" crafting ideas that we are finding on the internet right now.  Its amazing the amount of beautiful crafts everyone around the world are making from simple Dollar Tree finds!  Below you will find some really cute ideas you can make with simple wooden crates you can find from the Dollar Tree   For this and more crafting ideas, you can follow my Facebook group at www.Facebook.com/groups/TheGypsyHomestead  Happy Crafting!!!!!!! 


Go Back

So Many Oils, So Many Benefits!!!!

So Many oils, So Many Benefits!!!!! 

Are you looking for a healthier alternative to you current Health Routine?  

Essential oils have become the absolute go-to for a healthier alternative to our daily health needs.   Nature knows what its doing.  The alternative approach to health and wellness have been growing right in nature all along. 

If you havent tried Essential Oils, contact me today and find out how you too can begin your journey into health and well being with Essential Oils and all their benefits!  Looking to generate income from home?  I can help you start your journey as a Doterra Wellness Advocate! 

Visit my page and see for yourself all the opportunity Doterra has for you and your family! www.mydoterra.com/gypsymoon

May be an image of text that says 'dÃTERRA OnGuard 5L RRA Orgestzen DAGAN dOTERRA Lemon Citron ÄÃTERRA Melaleuca IMMUNE SUPPORT, PROTECT, CLEANER TUMMY THINGS, NAUSEA, SINUS DETOXIFY, CLEANER, UPLIFTING CLEANSING, ANTIVIRAL/BACTERIAL RESPIRATORY SUPPORT, SINUS CALMING, SOOTHING, SKIN NTI-INFLAMMATORY, RESTORATIVE ANTIFUNGAL, IMMUNOSTIMULANT COOLING, ANALGESIC, SINUS ÄÃTERRA M5SN dÃTERRA Easy Air Lavender MNTENNE PUN dÃTERRA dÃTERRA Frankincense dÃTERRA Oregano Peppermint'

Go Back

Saucy Bourbon Chicken

Saucy Bourbon Chicken!!!!
May be an image of food and text
 
Saucy Bourbon Chicken is a delicious New Orlean’s-style fusion of Cajun and Chinese cooking with sweet and tangy sauce coated chicken. This family favorite meal is ready in just 30 minutes! You'll want to lick your plate! For this and more recipes, follow me on my facebook group at www.Facebook.com/groups/TheGypsyHomestead
Enjoy and God Bless!!!!!
 

Go Back

In Need of Prayer???

In need of Prayer?  Feel free to contact me at TheGypsyHomestead@aol.com and I'd be happy to add your prayer request to the prayer chain!!!

May be an image of text that says 'Don't be anxious anxious about anything; rather, bring up all of your requests to God in your prayers and petitions, along with giving thanks. Philippians 4:6'

Go Back

Delicious Homemade Sloppy Joe Mix

Delicious Homemade Sloppy Joe Mix!  For more recipes you can follow me on Facebook at www.Facebook.com/TheGypsyHomestead 

May be an image of food and text that says 'HOMEMADE SLOPPY JOES 2 pounds ground beef 1 medium onion 1 green bell pepper 1/2 cup celery 1 can tomato sauce 1 can tomato paste 3/4 cup ketchup 1 tablespoon red wine vinegar 1 tablespoon worcestershire 2 tablespoons brown sugar'

Go Back

Peanut Butter Cup Stuffed Brookies

Peanut Butter Cup Stuffed Brookies
Ingredients:
1 (10oz) bag of brownie mix (plus the oil & egg to make the batter)
1 (6 pack) Reese's Peanut Butter Cups (12 cups total)
1 (16oz) package of refrigerated cookie dough
Instructions:
Preheat your oven to 350 degrees and generously grease a regular size muffin tin.
Prepare the brownie mix according the package directions; set aside.
Separate the cookie dough into 12 even balls and then squish them down into the bottom of each muffin cup.
Place a Reese's peanut butter cup upside down on top of the cookie dough.
Evenly distribute the brownie batter on top of each peanut butter cup until the wells are about 90% full.
Bake for 18-20 minutes or until the brownie batter is cooked through.
Allow them to cool for about 5 minutes before removing from the pan, and then enjoy while they are still warm.
 
May be an image of cupcake

Go Back

Delicious Doritos Chicken Casserole!!!!

May be an image of food and text

For this and many other recipes follow me on Facebook at www.Facebook.com/TheGypsyHomestead 

Go Back

Relief from Allergy Season!!!!

Allergies have everyone a mess right now! This is my go to oil that brings almost instant relief!

If you're needing any Breathe or any other oils, drop by www.mydoterra.com/gypsymoon and stock up!


May be an image of text that says 'Breathe Respiratory Blend... Breathe is a remarkable blend of CPTG essential oils which combine to do just that help you breathe easier. doTERRA's proprietary blend of laurel leaf, peppermint, eucalyptus, melaleuca, lemon, and ravensara cleanses and soothes the airways. ミ 15 Antiviral Anxiety Asthma Bronchitis Congestion Cough Emphysema Influenza Mono Pneumonia Sinusitis dÃTERRA Breathe Respiratory Blend wwW. mydoterra.com gypsymoon' May be an image of text that says 'dÃTERRA Breathe™ Respiratory Blend Aromatic, Topical Benefits .Promotes a restful night's sleep •Helps minimize the effects of seasonal threats •Maintains feelings of clear airways and easy breathing Uses •Diffuse at bedtime for sleep Use when outdoors to minimize the effects of seasonal threats •Diffuse or rub on chest or feet when seasonal and environmental threats are high restful night's mL 15 dÃTERRA® Breathe 사이 Blend' May be an image of text that says 'top 10 essential oils: Breathe Apply topically to maintain clear airways and breathing Supports overall respiratory health + Diffuse at bedtime for more restful sleep and to reduce snoring mL TM 15 +Apply to chest or bottom of feet to minimize seasonal threats and dÃTERRA® Breathe Respiratory Blend respiratory discomfort'

Go Back

Creamy Chicken Ceasar Salad

*Creamy Chicken Ceasar Salad*
Ingredients:
3 cloves garlic
3/4 c real mayo
2 tsp anchovy paste
2 tbsp parmesean
1 tsp worcestershire
1 tsp mustard
1 tbsp lemon juice
Salt - pepper
1 head torn romaine
1/3 c shaved parmesean
4 cups croutons
Cooked chicken breast cut into strips
* In a bowl, combine the garlic, mayo, anchovy, grated parmesean, worcestershire, mustard, & lemon juice. Whisk to combine well. Add salt and pepper to taste.
When ready to serve, place torn lettuce into a large serving bowl. Drizzle desired amount of dressing and toss. Add shaved parmesean and desired amount of cooked chicken strips and gently toss. Top with croutons.
For more recipes visit
www.TheGypsyHomestead.com and www.Facebook.com/TheGypsyHomestead
 
May be an image of food and indoor
 

Go Back

DIY Easy to Make Bunny Soaps!!!!!!

DIY Easy to Make Bunny Soaps!!!!!!

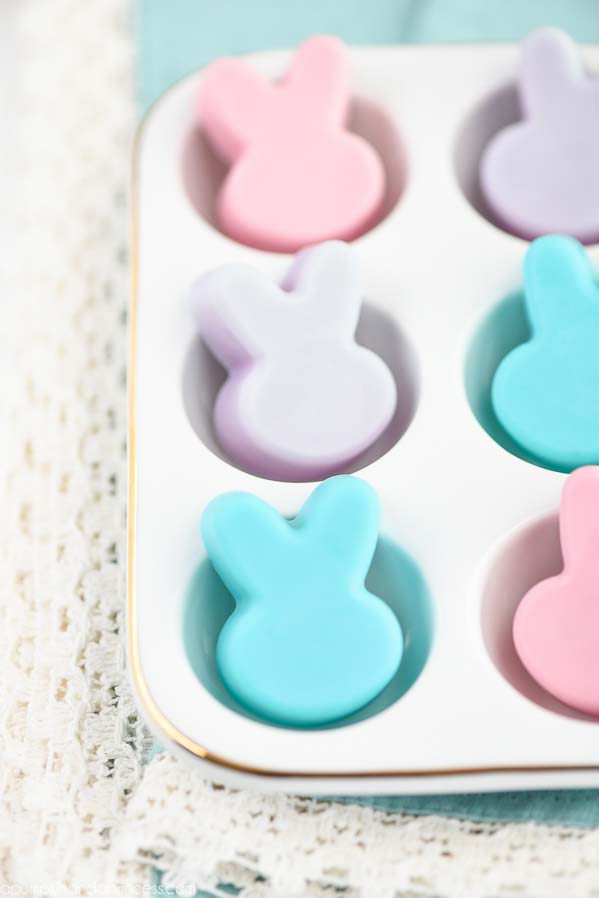
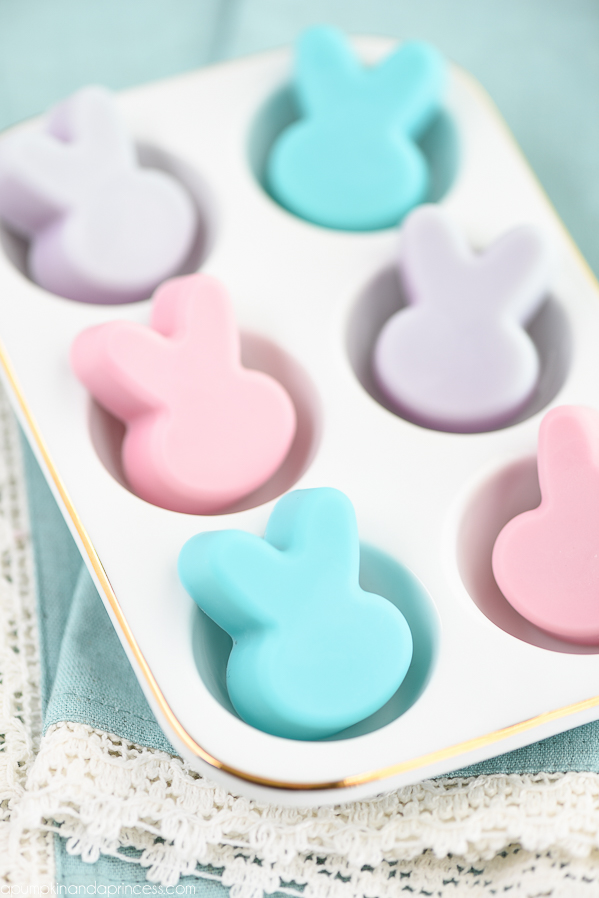
DIY Bunny Soap - These handmade bunny shaped soaps made with orange essential oil make a great candy alternative for Easter baskets.

The kids are officially on spring break for the next 10 days and I’m still having a hard time believing Easter is just around the corner.  Celebrating Easter Season and the first day of spring break make us want to decorate eggs. We plan on using some cool ideas to decorate, dye and paint our eggs....  Stay tuned for Egg Decorating Ideads!   Its also a good idea to also get the kid’s Easter baskets prepared with a few handmade gifts. Personally I try to keep  baskets simple with a chocolate bunny, maybe a small toy or plush animal, and then fill the rest with handmade gifts. Kids love homemade gifts!!!!!  Some cool ideas for easy handmade gifts are bath bombs in the shape of an egg using plastic eggs as the molds or my favorite, these small Bunny Soaps.

To make them I used a melt and pour soap base, a Bunny Silicone mold, and orange essential oil. 


How to make Easter Bunny Soap

  • Bunny Mold
  • Soap Base (Melt and Pour)
  • Orange Essential Oil
  • Soap Colorant
  • Step one: cut soap base into cubes and place in a large microwaveable bowl (I like to use a large pyrex cup). I love using this Goats Milk Soap Base. Melt soap by stirring often.
  • Step two: stir in essential oil and soap colorant. You can also use 1-2 drops of food coloring (if you only use a small amount it won’t dye your hands).
  • DIY Bunny Soap - These handmade bunny shaped soaps made with orange essential oil make a great candy alternative for Easter baskets.
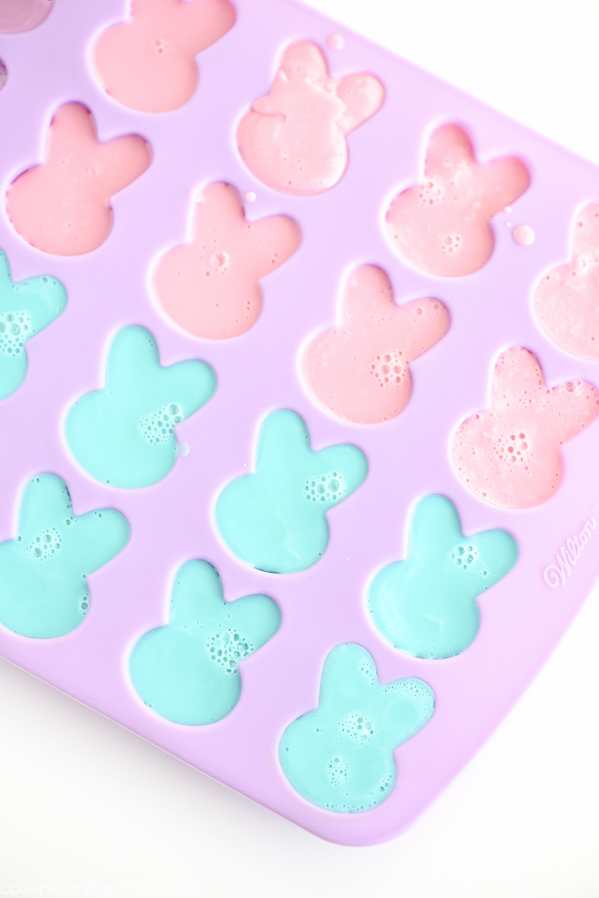
  • Step three: pour soap into the mold and allow soap to set for a few hours before removing.
  • DIY Bunny Soap - These handmade bunny shaped soaps made with orange essential oil make a great candy alternative for Easter baskets.
  • I plan to wrap them in small cellophane bags with paper grass!  What an adorable addition to any Easter Basket (child OR adult!)  So many varieties can be made, switch out colors, use glycerin base,  switch out essential oils to the scents you love- So many options for such an adorable easy gift made with love! Enjoy these adorable bunnies and God Bless!!!!                                                                          www.TheGypsyHomestead.com

Go Back

Adorable Easter Bunny Cake

Adorable Easter Bunny Cake!!!!

Easter Bunny CakeEaster Bunny Cake

Easter and bunnies basically go hand in hand and this might just be the cutest cottontail (cake) ever! With a tie made of jelly beans and a coconut and vanilla frosted face, we’re pretty sure both your adult and little Easter guests will be coming back for more than one slice.

All you need is a box of yellow cake mix to construct the adorable Easter bunny cake, plus a few other ingredients you may even have in your cabinet at the moment. 

How to Make an Easter Bunny Cake Kids and Grownups Will Obsess Over


Easter and bunnies basically go hand in hand and this might just be the cutest cottontail (cake) ever! With a tie made of jelly beans and a coconut and vanilla frosted face, we’re pretty sure both your adult and little Easter guests will be coming back for more than one slice.

All you need is a box of yellow cake mix to construct the adorable Easter bunny cake, plus a few other ingredients you may even have in your cabinet at the moment. 

 
  • SERVES

    16

  • ACTIVE TIME

  • TOTAL TIME


INGREDIENTS

  • (18.25-oz) box yellow cake mix
  • Vanilla frosting
  • 2 cups coconut, divided
  • Red food coloring
  • Jellybeans
  • Small candies
  • DIRECTIONS

  • Prepare cake mix according to package directions. Bake in two 9-inch round pans at 350°F for 25 to 30 minutes. Cool in pans for 10 minutes; remove to a rack and cool for 1 hour.

  • Set 1 cake on a large serving tray. Cut other cake into 2 large bunny ears and a bow tie; arrange as shown. Cover cake with vanilla frosting.

  • Tint 1 cup coconut pink by shaking in a plastic bag with a few drops of red food coloring; sprinkle on ears. Sprinkle head with 1 cup white coconut. Decorate with jellybeans and small candies.

  • KITCHEN COUNTER

    Serves 16Per Serving: 480 calories, 73g carbs, 3g protein, 20g fat, 360mg sodium, 25mg cholesterol, 1g fiber

    Enjoy this Adorable Easter Bunny Cake with your family this year!!!!   Thank you for stopping by and God Bless!!!!!! 

    www.TheGypsyHomestead.com 

Go Back

How to Start Seeds Indoors: When and How to Start your Seeds!

How to Start Seeds Indoors:  When and How to Start your Seeds! 

Cabbage Seedlings

WHY START FROM SEEDS?

When planning for a garden, a key thing to consider is whether you want to start your garden from seeds or from young plants (“transplants”) bought from a local nursery.

Each option has its advantages and disadvantages. Buying transplants is certainly a lot easier and more convenient, but you are also limited to only growing the types of vegetables and flowers that you can find. Seeds, on the other hand, offer a wide range of varieties to try. Here are the main things to think about:

  • If you want to grow a lot of plants, buying packs of seeds is usually cheaper than buying individual seedlings from the nursery.
  • While some nursery plants are grown really nicely, others may be of poor quality. When you plant your own seeds, you have control over the way the young plant is raised. This may be especially important if you are an organic gardener.
  • Finally, there isn’t always a great selection of plants at local nurseries. When you plant from seed, you have a much wider choice of varieties, tastes, and textures—and you can experiment with new ones, too!

For absolute beginners, it’s not a bad idea to start off with buying transplants, as you won’t have to stress over things like the timing of starting seeds or the care of young seedlings. That being said, there are many vegetables—such as carrots and radishes—that do best when started from seed, so consider employing both methods to suit your needs.
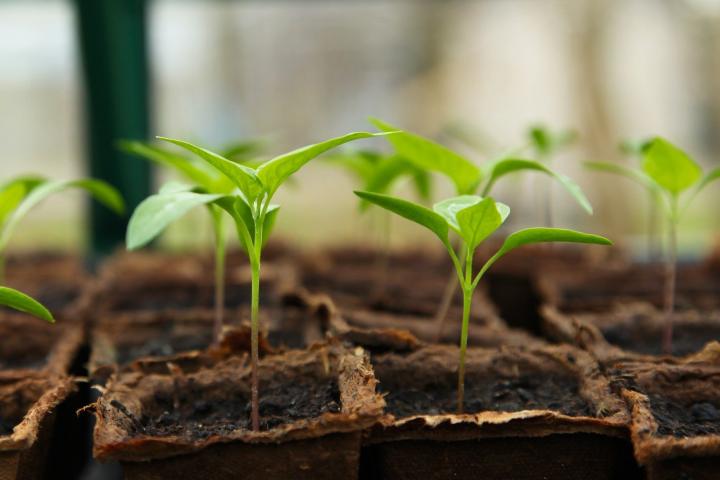
Pepper seedlings

STARTING SEEDS INDOORS VS. OUTDOORS

Once you’ve decided to try your hand at starting your own seeds, it’s time to think about starting them indoors or outdoors. There are many benefits to starting seeds indoors rather than waiting to sow them outdoors (aka “direct-sowing”). The main reason is to get an early start on the gardening season, but that’s not the only consideration:

  • In colder climates with short growing seasons, starting seeds indoors allows you to gain a few precious weeks of growing time, which can really make a difference when frost looms in the fall. Slow-growing crops such as tomatoes may not even have enough time to reach maturity if they are started outdoors.
  • In warmer regions, starting seeds indoors can allow you to get in an extra round of crops (especially cool-weather crops) before the heat of summer stifles growth. 

WHICH SEEDS SHOULD YOU START INDOORS?

Not all seeds should be started indoors. In fact, most vegetables grow perfectly well when started outdoors and even prefer not to be transplanted. Ultimately, it’s important to consider how each type of vegetable grows.

 Research which crops are typically started indoors and which are typically started outdoors. Keep in mind that there isn’t a hard-and-fast rule about what you can start indoors and outdoors; it varies by your experience, your personal preference, your location, and the plant itself.

  • Crops that are best started indoors include broccoli, brussels sprouts, cabbage, lettuce, and tomatoes. Those with a slower root development, like cauliflower, celery, eggplant, and peppers, should also be started indoors.
  • Tender vegetables like tomatoes, eggplants, and peppers are very susceptible to the cold temperatures of spring, so it’s best to start them indoors and keep them safe from unpredictable weather.
  • Plants that do not transplant well and are therefore best started outdoors or in containers include cucumbers, muskmelon, pumpkins, squash, and watermelon. These are all tender, however, so refrain from sowing them outdoors while frost is still a threat.
  • Some plants truly resist transplanting. For example, root vegetables like carrots and beets don’t like having their roots disturbed, so it’s usually safer to just start their seeds outdoors in the ground rather than transplant them later on. Plants with long tap roots also do not like to be transplanted; examples include dill and parsley.
  • Finally, plants like radishes and peas are so fast growing and cold tolerant that it just makes sense to get them right in the ground! 
  •  

  • TIPS BEFORE YOU START SEEDS INDOORS

  •  
  • Be seed-savvy. Obtain seed catalogues from several companies and compare their offering and prices. Some of the regional companies may carry varieties better suited to your area.
  • Make a list of what you’d like to grow. A good rule-of-thumb is to imagine your garden one-quarter the size that it really is. This allows for good spacing practices! 
  • Prepare for some losses. Though it’s good not to plant too much for your garden space, it’s also good to assume that some of your seeds won’t germinate, or that they will inexplicably die off later. Plant a few extra, just in case.
  • Consider a grow light if you start in late winter. Most veggies need between 6 to 8 hours of direct sun (minimum), so it’s important to have a grow light if you are sowing your vegetable seeds indoors in late winter. A grow light will also keep your seedlings from getting too leggy. 
  • Use clean containers. Most seed catalogs offer seedling flats, peat pots, and other growing containers, but egg cartons make good containers for the earliest stages of seed starting, too. Be sure to poke holes in the sides near the bottom of the containers you use in order to allow excess water to drain. Keep in mind that you might need to transplant your seedlings into larger containers at some point before moving them into the garden.
  • Label your containers now! There’s nothing more frustrating than forgetting what you planted, especially when you are testing out different varieties of the same plant.
  • You may have to soak, scratch, or chill seeds before planting, as directed on packet.
  • Seeds sprout best at temperatures of 65 to 75°F (18-24°C). Don’t let it get too cold.
  • Rotate your seedlings. If you keep your seedlings next to a window, remember to rotate the containers every so often to keep the seedlings growing evenly. If you’re using a grow light, remember to raise it a few inches above the tallest seedling every couple of days.
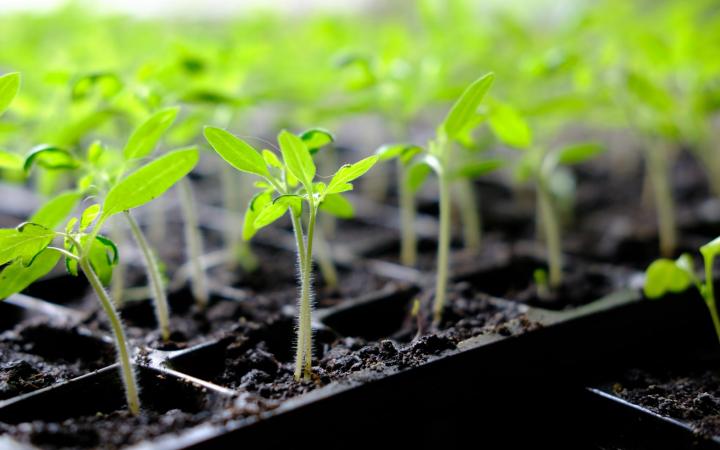
  • Seedlings. Photo by Sergii Kononenko/Shutterstock
  • WHEN TO START SEEDS INDOORS

  • The Planting Calendar lists the ideal dates to start your vegetables indoors. You can find a customized tool that’s based on your zip code and local frost dates!
  • As a general rule, most annual vegetables should be sown indoors about six weeks before the last frost in your area. See local frost dates.
  • Do not sow too early in the season or you’ll end up having to transplant seedlings into bigger containers more often because conditions outside still aren’t suitable for outdoor planting. 
  • Your packet of seeds will often list when the seeds should be started indoors. For example, it may say, “start indoors 8 weeks before last expected frost date in your area.”
  •  
  • TYPES OF SEED-STARTING CONTAINERS

    Plastic Food Containers (Yogurt Cups, Sour Cream Containers, etc.)

    Plastic food containers such as yogurt cups or sour cream containers make for excellent seed-starting pots. Simply clean them out and poke a few drainage holes in their bottoms. They are generally large enough to house one or two small seedlings for a few weeks. Eventually, seedlings will need to be transplanted into their own pots.

    Seed Flats or Trays

    A seed flat or tray is a single tray-like container that is useful for sowing very tiny seeds such as basil or easy-to-transplant flower seeds. The seeds are sown in the tray and, when big enough to handle, are transplanted on to their own individual pots or plug trays. The compact size of seed trays makes for a very efficient use of space during this first stage of growth.

  • For easy cool-season crops—everything from onions to celery to cabbage—you can sow multiple seeds in the same container or seed flat. You can even stack trays up after sowing to save on space. After two or three days, start checking daily for signs of germination then move them out to the greenhouse or cold frame to continue growing. Or you can continue to grow seedlings on indoors, using grow lights to ensure strong, even growth.
  • Note: Larger seedlings, or those of tender crops such as tomatoes or peppers, will likely need to be potted up to a larger container at least once. They grow fast and will need to be pricked out into individual pots before they are transplanted into their final outdoor growing spots once the threat of frost has passed.
  • Plug Trays

    Plug trays are basically containers with individual pockets for each seed. They minimize root disturbance and save time, because often seedlings can go straight from their plug tray to the outdoors.

  • Trays with smaller plugs suit most leafy greens and radishes, especially if they will be transplanted promptly (within three or four weeks of sowing).
  • Those with larger plugs are great for sowing chunkier seeds such as beans and bigger, hungrier seedlings such as those of the brassica family (broccoli, cabbage, cauliflower, etc.). 
  • Well-made trays of rigid plastic can potentially last for many years, but if you want to avoid plastic, look for alternatives made of biodegradable fiber. 

    HOW TO SOW SEEDS

  • Fill clean containers with an all-purpose potting mix or seed compost. Pre-formed seed starters (such as Jiffy pellets) work well, too. Do NOT use regular potting soil. It’s not fine enough for many seeds’ roots to easily penetrate the soil and does not allow oxygen to flow. 
  • If you are using plug trays, push potting mix down into the plugs with your fingers so it’s nice and firm, then add a little more potting mix.
  • Now make shallow depressions with your fingertips. Plant your seeds into the depressions at the depth listed on the seed packet. Most seeds can simply be gently pressed into the mixture; you can use the eraser end of a pencil to do so. When choosing which seeds to plant, choose the largest seeds in the packet for the best chance at germination. Many vegetables, including common crops such as salads, onions, beets, peas, and radishes, may be sown in pinches of three to five seeds per plug for planting out as a cluster of seedlings. Larger seeds, like beans, are sown individually into deeper holes made with a finger, pencil, or dibber.
  • Once you’re done sowing, sieve a little more potting mix over the top. Gently skim over the surface of the tray with your hands to ensure all the seeds are buried. Water trays carefully using a watering can or clean turkey baster. A pitcher may let the water out too forcefully, dislodging the seeds or young seedlings’ fragile roots. A mist sprayer is gentle but can take a long time. We recommend using a meat-basting syringe (aka “turkey baster”), which will dispense the water effectively without causing too much soil disruption. Go over the trays a couple of times so that the potting mix is completely moistened through. Label trays with the variety and date of sowing.
  • Cover containers loosely with plastic or an otherwise clear, waterproof covering to keep them from drying out too quickly. Poke a few holes in the plastic with a toothpick for ventilation; mold growth can occur if containers are not allowed to “breath.”
  • Check trays and pots regularly for moisture. Lifting them up is a good way to judge how much moisture there is in the potting mix. If it’s light, water. One way to achieve a thorough watering is to pop trays into a reservoir to soak up water through their drainage holes. Remove them once you can see it’s moist at the surface.
  • When seedlings start to appear, remove the plastic covering and move containers to a bright window or under grow lights. 
  •  

  • PRICKING OUT, POTTING UP

    If you grew seedlings all together in a tray, you can transfer them into their own plugs or pots of potting mix. Start pricking them out as soon as the seedlings are big enough to handle.

    Carefully ease the seedlings out of the tray they were growing in then gently tease them apart. Try to retain as much of the original potting mix around the roots as you can. Work with small batches of seedlings so they don’t dry out while their roots are bare.

    Make holes in the potting mix with your finger, a pencil, or something similar. Lift each seedling carefully and avoid pinching their delicate leaves, roots, and stems. Carefully feed the roots right down into the hole then gently firm the seedling in. You can bury some of the stem if the seedlings are looking a little leggy and drawn. This will help to support them.

    Once you’re done, gently water the seedlings with a watering can. Don’t worry too much if the seedlings get a little flattened, they’ll soon recover.

    PREPARING SEEDLINGS FOR PLANTING

    Water seedlings to keep the potting mix moist, but be careful not to overwater. If you’re growing in a greenhouse, tunnel or cold frame, ventilate it on mild, sunny days. This will help keep the air inside moving, and reduce the risk of disease and molds.

    Cool-season crops such as lettuce, onions, beets, or peas can go straight outside as soon as the ground is ready, meaning that the soil is no longer cold and wet, and has reached around 50ºF (10ºC). You can help encourage stronger seedlings in preparation for the move by occasionally running your hand gently over the seedlings.

    Plant seedlings out while they are still quite young if outdoor conditions allow—sometimes as soon as three to four weeks after sowing. Younger seedlings tend to establish quicker than those that have become root bound in their containers.

  • Once you have raised your seedlings indoors, it is important to take steps to acclimatize them to their new outdoor home however, or you risk losing your plants and wasting all that hard work. This is a process known to gardeners as “hardening off.” This will prepare the seedlings for the harsh realities (i.e., climate) of the outside world! 

    Hardening off should take a minimum of a week and may take up to two. Suddenly moving plants from a stable environment to one with wide variations in temperature, light and wind can seriously weaken plants.

  • For most plants, start hardening off about a week before the final frost date for your area. Check the Gardening Calendar (or instructions on back of seed packets)  for safe dates to plant outside and work back from there. Withhold fertilizer and water them less often.
  • Seven to ten days before transplanting, set the seedlings outdoors in dappled shade for a short time. Make sure the spot is sheltered from winds.
  •  
  • Gradually extend the amount of time that plants are outside over the course of a week or two, until they’re staying out all day.
  • Keep the soil moist at all times during this period. Dry air and spring breezes can result in rapid transpiration. If possible, transplant on overcast days or in the early morning, when the sun won’t be too harsh.
  •  
  • If you’re not able to be around to bring your seedlings back in during the day, another option is to place your seedlings into a cold frame and gradually increase the amount of ventilation by opening vents progressively wider each day. Make sure to shut them down completely before dark.
  •  
  • How to Transplant Seedlings

    After the hardening-off period, your seedlings are ready for transplanting. Read articles about transplanting seedlings .Consult the library  for growing guides, which provide planting, care, and harvesting information for all the common vegetables, fruit, and herbs.

  • Happy Gardening!!!

  • As Always you can find more daily information on my facebook page at www.Facebook.com/TheGypsyHomestead

  •  


Go Back

Delicious St. Patricks Day "Bring Good Luck Meal" of Corned Beef Cabbage

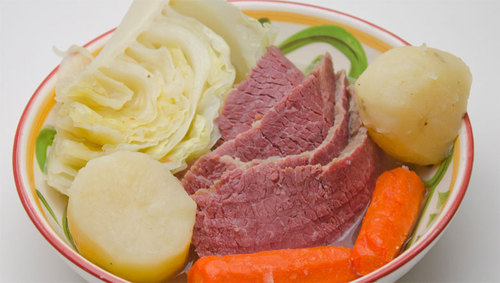
Delicious St. Patricks Day "Bring Good Luck Meal" of Corned Beef and Cabbage

No photo description available.

Surprisingly, corned beef and cabbage is not an Irish tradition. It is an Irish-American tradition. Corned pork and cabbage is more common in the Emerald Isles, but Irish immigrants to the U.S. found beef more plentiful in their lower Manhattan  where the butchers were mostly kosher and pork was verboten.

Traditional on St. Patrick's Day when everyone is Irish -- it is not served more often -- and my guess is that people just take it out of the wrapper and throw it in a pot with carrots, potatoes, cabbage and maybe some onions, and they feel they have met their obligation. But everything is soooooo salty, the meat is tough and fatty, and the veggies and potatoes are mushy.

Here's how to do the dish properly. If you have leftovers, make Rockin' Reuben Sandwiches, or Corned Beef Hash. But if you do it right, there won't be leftovers.

Makes. 6 servings (the meat shrinks quite a bit)
Preparation time. 10 minutes
Cooking time. 3 to 4 hours

Ingredients
1 (3 pound) slab of corned beef, preferably home made
2 tablespoons coarsely ground black pepper
2 tablespoons pickling spices, preferably home made
4 medium carrots, peeled and cut into 1" segments
2 pounds of potatoes, cleaned and cut into 2" chunks
1 small head of cabbage, outer leaves removed, cut in quarters

Do this
1) Open the package the meat came in and dump out all the liquid. Rinse thoroughly. Trim off all the fat cap. If you have made your own corned beef, and you should, it is just plain better, remove it from the brine, and rinse it well

2) Corned beef is essentially pickled in salt, and straight out of the pack it is way too salty. Before we can eat this cured meat, we need to cook it and desalinate it a bit. Place the beef in a large pot along with enough hot water to cover it by at least 1" and put the lid on. 

Turn the heat to medium and bring to a low simmer for 30 minutes. Do not let it boil. If you boil it, it will get tough and shrink. Beware that the meat is cold, so when it warms the water will slowly move from simmer to boil. Keep an eye on it and do not let it boil. After 30 minutes, dump out the water and cover the meat with fresh hot water. This time add the pickling spices.

Bring to a low simmer again, this time for 1 hour. Again dump the water and pickling spices and replace it with fresh hot water. Bring to a simmer and let it simmer for 1 hour. Add the carrots. After 30 minutes add the potatoes. After 10 minutes add the cabbage. After 15 minutes the cabbage will be done and so should everything else.

3) Remove the meat and place it on a carving board. There are often two horizontal muscles separated by a thick layer of fat. Separate them by sliding a knife through the fat. Carve and/or scrape off the fat layer. Carve the meat by cutting across the grain about the thickness of a pencil. Any thinner and it will fall apart, any thicker and it will be chewy.

5) Lift out the cabbage, potatoes and carrots and divide them into serving bowls. Place the meat in the bowl. Spoon some of the cooking liquid over them and serve. Happy Holiday!

2012-03-15-corned_beef_and_cabbage.jpg

Go Back

St. Patricks Day Grasshopper Cheesecake with Heavenly Chocolate Ganache

St. Patricks Day Grasshopper Cheesecake with Heavenly Chocolate Ganache!  Yum!  Everyone will love this cheesecake~ 


Ingredients

Servings: 16-18
Prep Time: 30 minutes
Cook Time: 1 hour 5 minutes
Set Time: 6 hours to overnight
  • Crust:
  • 2 cups Oreo Cookie crumbs
  • 1/4 teaspoon salt
  • 6 Tablespoons butter- melted
  •  
  • Cheesecake Layer:
  • 4 (8 oz) packages cream cheese- softened
  • 1/2 cup granulated sugar
  • 3 Tablespoons Flour
  • 1/4 cup crème de menthe liqueur
  • 1/2 cup heavy whipping cream
  • 3 eggs
  • 2-3 drops green food color- optional
  • 1/2 cup mini chocolate chips
  • Ganache Layer: 
  • 1/2 cup semi sweet chocolate chips
  • 1/4 cups heavy  whipping cream
  1. Preheat your oven to 350 degrees and prepare a 9” springform pan with non-stick spray and set aside.
  2. In a food processor, pulse oreo cookies until you get 2 cups of crumbs. Add in salt, and butter and pulse until combined.
  3. Pour into the bottom of the springform pan and using the back of a spoon, gently press the crumbs to form the crust. 
  4. Be sure to bring the crumbs about 1 inch up the side.
  5. Bake at 350 for 10 minutes.
  6. In the bowl of a stand mixer equipped with a paddle attachment (or using an electric hand mixer) cream the cream cheese for 2-3 minutes or until smooth and there are no lumps remaining. Mix in the sugar, flour and mix until just combined.
  7. Mix in crème de menthe and mix until smooth.
  8. Pour in the heavy cream and start whisking on low speed until combined then slowly increase speed to high for 30 seconds.
  9. Add in eggs one at a time, fully incorporating after each addition. Scrape the sides and bottom of the bowl. Give one final mix to make sure everything is incorporated.
  10. Pour the batter into the prepared pan and smooth.
  11. Bake on 350 for 15 minutes then, without opening the oven door, reduce heat to 200 and bake for an additional 50 minutes.
  12. Once the 50 minutes is up, turn the heat off and slightly crack the oven door for about 20-30 minutes to allow the cheesecake to slowly cool. (NOTE: this step is not necessary, however it helps reduce cracking)
  13. Allow the cheesecake to come to room temperature and place in the refrigerator overnight.
  14. In a microwave safe bowl, heat the heavy cream for 30 seconds or until hot. Add in the chocolate chips and let sit for 2-3 minutes then whisk until smooth.
  15. Pour over the set cheesecake and smooth.
  16. Top with a ring of whipped cream and chopped mint chocolate candy and serve.

Go Back

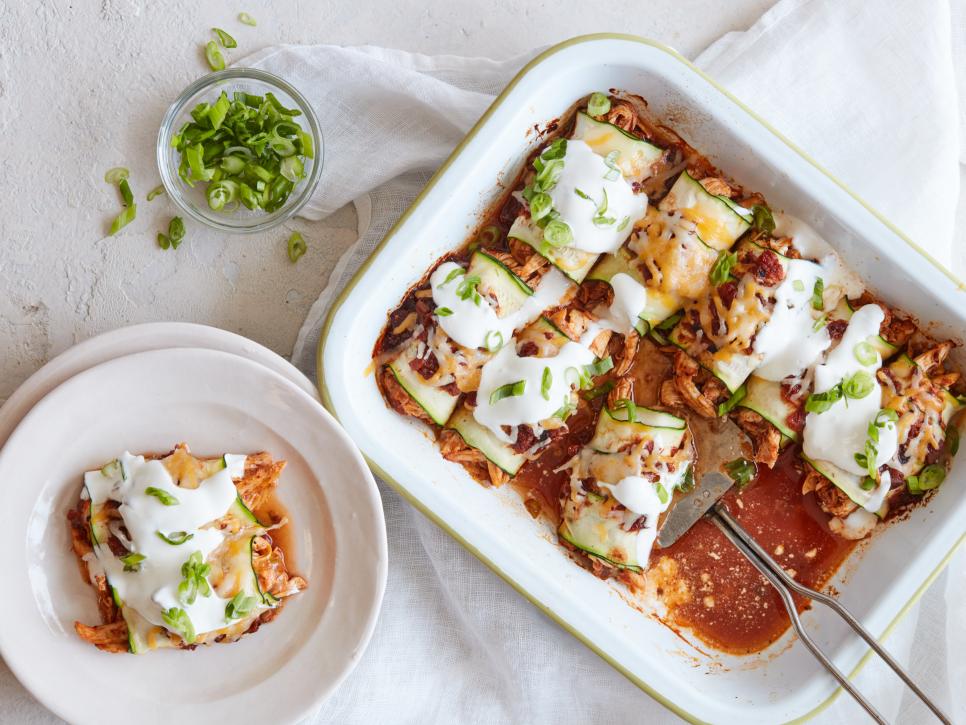
Easy Low Carb Chicken Zucchini Enchiladas

Easy Low Carb Chicken Zucchini Enchiladas:

Ingredients: 

  1. Heat the oil in a large skillet over medium heat. Add the scallion whites and garlic and cook, stirring frequently, until soft, about 5 minutes. Sprinkle in the chili powder and cook, stirring, until the scallions are coated and the oil is brick red, about 1 minute. Remove from the heat and stir in the chicken, 1/2 cup of the salsa and 1/2 cup of the cheese. Set aside. 
  2. Halve the zucchini lengthwise and arrange cut-side down on a work surface. Use a Y-shaped vegetable peeler to shave off ribbons the entire length of each zucchini and as wide as possible (the first few may be too skinny). Make 36 zucchini ribbons total. 
  3. Lay out 3 ribbons, slightly overlapping to make a rectangle (think of this as your "tortilla"). Pile about 1/4 cup of the chicken mixture down along one of the short ends of the zucchini tortilla and then roll up to enclose the filling. Put in a 2- to 3-quart baking dish. Roll up the remaining zucchini ribbons and filling and arrange in the dish. Top the rolls with the remaining 1 cup salsa. Add several dashes of the hot sauce and sprinkle with the remaining 1/2 cup cheese. 
  4. Bake until the cheese is melted and the filling is hot, about 25 minutes. Let cool for a few minutes. Thin the sour cream out with a little water and drizzle over the enchiladas. Sprinkle with the reserved scallion greens and serve with more hot sauce if you'd like.
  5. ~Until We Meet Again~
  6. www.facebook.com/TheGypsyHomestead 

Go Back

15 blog posts